There’s something almost ritualistic about pressing down on an AeroPress. That satisfying hiss at the end. The concentrated aroma rising from your mug. I’ve made thousands of cups with mine—in cramped hostel kitchens in Guatemala, on balconies overlooking Vietnamese coffee farms, and countless times at home when I just need good coffee, fast.
If you’re wondering how to use AeroPress to brew café-quality coffee at home (or anywhere), you’re in the right place. This guide covers everything from the standard method to the inverted technique preferred by championship brewers. Let’s dive in.
What is an AeroPress Coffee Maker?
The AeroPress looks almost like a giant syringe. It’s a plastic brewing device that uses air pressure to push hot water through coffee grounds. Simple concept. Incredible results.
The Story Behind AeroPress: Alan Adler’s Invention
Stanford engineering instructor Alan Adler created the AeroPress in 2005. His goal? Brew a single cup of smooth, low-acid coffee without the bitterness. According to Alan Adler’s story and invention process, he spent years prototyping before landing on this hybrid design.
What makes it unique is the combination of immersion brewing (like a French press) with pressure extraction (like espresso). You get body and clarity in the same cup.
Why AeroPress Became a Coffee Culture Phenomenon
The World AeroPress Championship now spans 60+ countries. It started as a grassroots movement among baristas and has become a global competition. Why such devotion to a plastic tube?
Three reasons: portability, versatility, and consistency. I’ve traveled with mine for a decade. It’s unbreakable, weighs almost nothing, and brews incredible coffee anywhere you can boil water.
What You Need to Get Started with AeroPress
Before we brew, let’s gather your equipment. The beauty of AeroPress is you don’t need much.
Essential Equipment
- AeroPress (chamber, plunger, filter cap, stirrer, scoop)
- Paper filters (included) or reusable metal filter
- Kettle with temperature control (ideal but not required)
- Scale for accurate dosing (15-17g is typical)
- Timer (your phone works fine)
- Burr grinder for consistent grounds—learn why burr grinders produce consistent results
Choosing the Right Coffee Beans and Grind Size
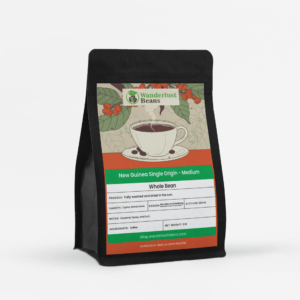
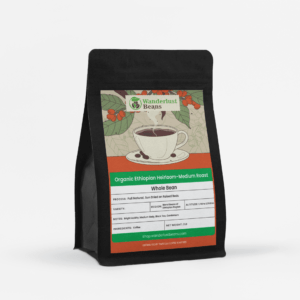
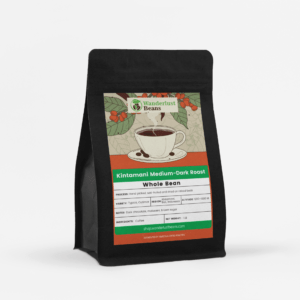
Start with freshly roasted specialty coffee. Beans roasted within the past 2-4 weeks make a noticeable difference. You can browse our specialty coffee selection for beans that shine in an AeroPress.
For grind size, aim for medium-fine—somewhere between pour-over and espresso. It should feel like table salt, not powder. Need help dialing it in? Check our guide to understanding coffee grind sizes.
Water temperature matters too. The official AeroPress instructions suggest 175°F for lower acidity. Most specialty coffee folks (myself included) prefer 195-205°F for fuller extraction. Experiment and find your sweet spot.
How to Use AeroPress: The Standard Method
This is the official method from AeroPress instructions. It’s stable, beginner-friendly, and produces excellent coffee.
Step-by-Step Standard Brewing Instructions
- Prepare the filter: Place a paper filter in the cap. Rinse it with hot water to remove paper taste and preheat your mug.
- Attach and position: Lock the filter cap onto the chamber. Set it on your mug (numbers facing up).
- Add coffee: Pour in 15-17g of medium-fine ground coffee.
- Add water: Start your timer. Pour water heated to 195-205°F up to the number 2 or 3 mark (roughly 200ml).
- Stir gently: Use the paddle or a spoon to stir for 10 seconds. Ensure all grounds are saturated.
- Insert plunger: Place the plunger in the chamber about 1cm deep. This creates a vacuum seal and prevents dripping.
- Steep: Wait 60-90 seconds total brew time.
- Press: Apply steady, gentle pressure for 20-30 seconds. Stop when you hear the hiss—that’s air pushing through.
Standard Method Pros and Cons
Pros: Stable setup, less mess, great for beginners, lower spill risk.
Cons: Some coffee drips through during steeping, giving you slightly less control over extraction time.
The AeroPress Inverted Method Explained
Here’s where things get interesting. The inverted method has become the darling of specialty coffee enthusiasts and competition brewers. I use it about 80% of the time.
Step-by-Step Inverted Brewing Instructions
- Set up inverted: Insert the plunger into the chamber about 1cm. Flip it upside down so it stands on the plunger.
- Add coffee: Pour 15-17g of medium-fine grounds into the chamber (now facing up).
- Add water: Pour water to near the top (leave room for the filter cap). Start your timer.
- Stir and steep: Stir gently for 10 seconds. Let it steep for 60-120 seconds, depending on your taste.
- Attach filter cap: Rinse your paper filter, place it in the cap, and lock it onto the chamber.
- Flip and press: Place your mug on top. In one confident motion, flip the whole setup. Press slowly for 20-30 seconds.
Pro tip from years of travel brewing: Hold the chamber and mug together firmly during the flip. I’ve learned this lesson the hard way in more than one hostel kitchen.
When to Use the Inverted Method
Choose inverted when you want:
- Full immersion with no drip-through
- Complete control over steep time
- Richer body and more pronounced flavors
- To experiment with longer extraction times
Many World AeroPress Championship winners use the inverted method. It’s slightly riskier but rewards you with a more developed cup.
Perfecting Your AeroPress Coffee Ratio
Getting your ratio right transforms AeroPress coffee from “good” to “exceptional.”
Understanding Coffee-to-Water Ratios
The official AeroPress recipe uses a concentrated 1:6 ratio (coffee to water), then dilutes with hot water afterward. This creates an Americano-style brew.
Most specialty coffee brewers prefer 1:15 to 1:17—meaning 15-17 grams of water for every gram of coffee. For a typical brew:
- 15g coffee + 225ml water = 1:15 (stronger)
- 15g coffee + 255ml water = 1:17 (balanced)
For a deeper understanding, read our guide on coffee-to-water ratio fundamentals.
Adjusting Strength to Your Taste
The magic of AeroPress is flexibility. Want stronger coffee? Use more grounds or less water. Prefer a lighter cup? Extend with hot water after pressing. According to scientific research on coffee extraction, small changes in ratio and temperature significantly impact flavor compounds.
Troubleshooting Common AeroPress Problems
Even seasoned AeroPress users hit snags. Here’s how to fix the most common issues:
- Bitter coffee: Lower your water temperature, use a coarser grind, or reduce steep time.
- Weak or sour coffee: Increase water temperature, use a finer grind, or steep longer.
- Hard to press: Your grind is too fine. Coarsen it up or use slightly less coffee.
- Coffee leaking (standard method): Make sure the filter is properly seated. Official AeroPress filters seal better than some third-party options.
- Channeling: Ensure grounds are distributed evenly. Tap the chamber lightly to level the bed before adding water.
- Metallic or papery taste: Always rinse your paper filter with hot water before brewing.
AeroPress vs Other Brewing Methods
How does AeroPress stack up against other methods? Here’s my take after years of brewing coffee across multiple continents:
| Method | AeroPress Comparison |
|---|---|
| French Press | AeroPress produces a cleaner cup with less sediment. Faster brew time too. |
| Pour-Over | AeroPress has more body but less clarity. Easier to master. |
| Espresso | Similar pressure concept, but AeroPress won’t produce true crema. Different, not lesser. |
| Cold Brew | AeroPress extracts in minutes; cold brew immersion brewing takes hours. Both excel at smooth, low-acid coffee. |
Want a broader overview? Compare other brewing methods in our complete guide.
Creative AeroPress Recipes and Variations
Once you’ve mastered the basics, the AeroPress becomes a canvas for experimentation.
Iced AeroPress Coffee
Fill a glass with ice cubes. Brew a strong AeroPress concentrate (use 20g coffee, brew to level 2) directly over the ice. The rapid cooling locks in bright, vibrant flavors. This is my go-to in Southeast Asian summers.
AeroPress Concentrate for Lattes
Use a 1:5 ratio (20g coffee to 100ml water). Press directly into a mug with steamed or frothed milk. It’s not espresso, but it’s delicious—and far more accessible.
The best part about experimenting? Different origins shine differently in the AeroPress. Light-roasted Ethiopians explode with fruit notes. Medium Colombian beans deliver chocolate sweetness. Explore single-origin flavor profiles to find beans that match your taste.
Cleaning and Maintaining Your AeroPress
One of my favorite things about the AeroPress: cleanup takes 30 seconds.
Daily cleaning: After pressing, unscrew the cap and push the plunger through to eject the coffee puck directly into compost or trash. Rinse all components with water. Done.
Weekly deep clean: Wash with mild soap to remove coffee oils that build up over time. Pay attention to the rubber plunger seal.
Seal maintenance: If pressing becomes too easy or you notice leaks, your rubber seal may be worn. Replacements are inexpensive and widely available.
Storage tip: Store with the plunger pushed all the way through or removed entirely. Leaving it compressed can deform the seal over time.
This durability is exactly why the AeroPress has been my travel companion for years. It’s survived checked luggage, dusty backpacks, and more than a few rough mornings.
Start Brewing Better Coffee Today
Learning how to use AeroPress opens up a world of coffee possibilities. Whether you’re brewing at home or in a far-flung hostel, this simple device delivers remarkable results.
Start with the standard method to build confidence. Graduate to inverted for more control. Dial in your ratio. Then experiment endlessly.
That’s the joy of AeroPress—it meets you where you are and grows with you. Now go make some exceptional coffee.